
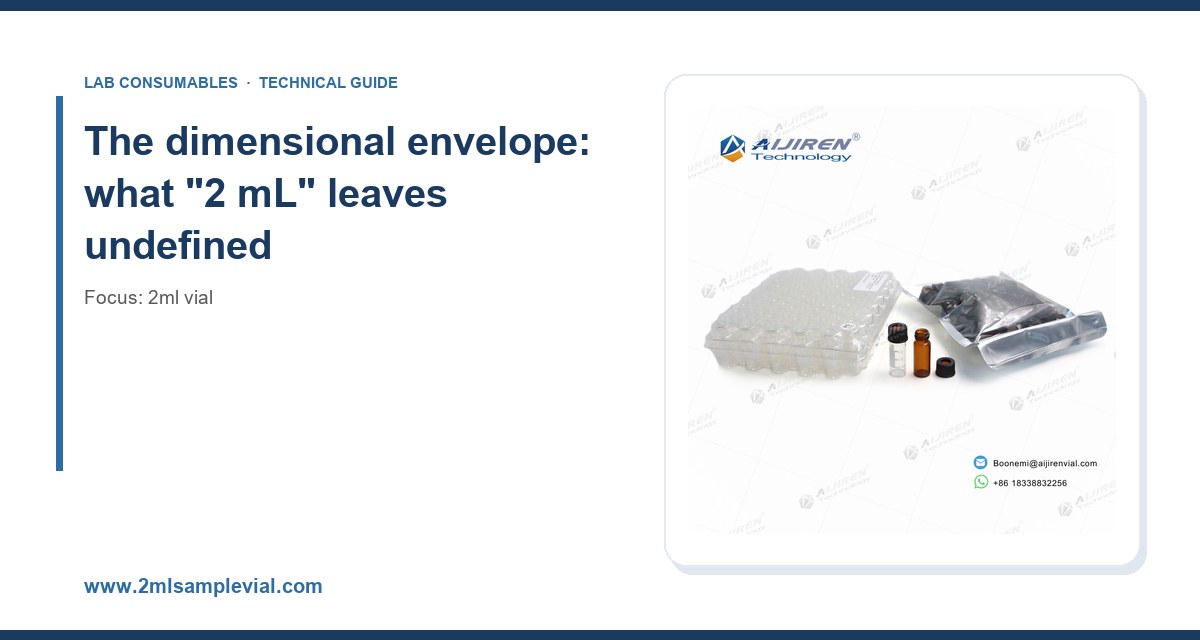
I once watched a lab burn through three cases of 2 mL vials in a week because someone ordered 32 x 11.6 mm vials for a tray that was machined for 32 x 12 mm. The difference is 0.4 mm on the diameter and about 1.5 mm on the height, which sounds like nothing until the autosampler gripper closes on the cap and the vial sits 1.5 mm low in the nest. The needle bent, the run aborted, and the analyst spent a day chasing a “bad column” that was never bad. That is the whole problem in one story: 2 mL is a family of dimensions, not a single part number, and the instrument defines which member of the family you can actually use.
This guide is about the dimensional matching problem specifically. Not “which vial is best,” but which vial physically and functionally fits the autosampler or inlet you own, and how to prove it before you sign a purchase order. I will give you the numbers, the failure modes, and a decision checklist you can hand to procurement.
A 2 mL autosampler vial is defined by a set of dimensions that the “2 mL” label does not constrain at all. The nominal fill volume is a consequence of the geometry, not a specification. In practice you will encounter at least four dimensional families that all get sold as 2 mL vials, and they are not interchangeable.
- 32 x 11.6 mm (the “wide mouth” or “short” 2 mL vial). Standard on most Agilent and CTC-style trays. Crimp or screw top. This is the most common format in HPLC autosamplers.
- 32 x 12 mm (the “tall” 2 mL vial). Common on Shimadzu and some older Waters trays. The extra 0.4 mm of height matters in trays with tight Z-clearance.
- 12 x 32 mm is the same part described the other way round (diameter x height); watch for this in catalogs, because a 12 x 32 mm listing and a 32 x 12 mm listing are the same vial and a 32 x 11.6 mm listing is not.
- 8 mm and 9 mm neck variants. The neck outside diameter determines which crimp or screw cap fits, and it determines whether your autosampler needle guide will clear the cap.
The neck is where most mismatches hide. An 11 mm crimp neck and a 9 mm screw neck look similar in a photo and are completely different in a tray. If you buy 9 mm screw-thread vials for a tray built around 11 mm crimp vials, the cap sits lower, the gripper may not engage, and the needle guide may not center. The 2 mL fill volume is identical. The fit is not.
If you want the baseline geometry and the standard catalog families in one place, the 2 mL vial reference on this site lays out the common formats. What it does not do, and what this article does, is tell you how to reconcile those formats against a specific instrument’s tray and inlet.
Start from the tray, not the vial
The tray (or “sample carousel,” or “magazine,” depending on the vendor) is the hard constraint. It has fixed nest diameters, fixed nest depths, and a fixed gripper or needle stroke. You cannot negotiate with it. So the first step in any vial selection is to measure or look up the tray, not the vial.
What to measure on the tray
- Nest diameter. Typically 12.0 to 12.2 mm for a 32 x 12 mm vial, or 11.8 to 12.0 mm for a 32 x 11.6 mm vial. A vial that is 0.2 mm oversized will not drop into the nest and will sit proud; a vial 0.3 mm undersized will rattle and the gripper will miss.
- Nest depth and Z-clearance. The distance from the top of the nest to the needle guide or gripper jaw. This is where the 11.6 vs 12 mm height difference bites. If the tray was designed for 12 mm and you insert 11.6 mm, the vial sits 0.4 mm low; if the needle guide is set for a fixed depth, the needle may not reach the septum center or may pierce off-center.
- Gripper jaw opening. Some robotic arms have a fixed jaw; others are spring-loaded. A fixed jaw sized for 12.0 mm will not close on an 11.6 mm vial without slipping.
- Cap clearance. The vertical space above the vial top for the cap plus the crimp or screw head. An 11 mm crimp cap adds roughly 6 mm above the neck; a 9 mm screw cap adds roughly 5 mm. If your tray has 5.5 mm of clearance, the crimp cap will foul.
What to look up on the instrument side
Every major vendor publishes the tray and vial compatibility in their consumables catalog. Agilent’s chromatography consumables and column documentation lists the vial part numbers per autosampler model, and Thermo Fisher’s sample handling pages do the same for their TriPlus and AS/TS autosamplers. Use those as the starting point, then verify against the physical tray, because catalogs lag instrument revisions by a year or more. I have seen a tray revision change the nest depth by 0.5 mm with no change to the part number on the instrument.
Restek’s technical resources are also useful here because they cross-reference vial dimensions to instrument families in a way the OEM catalogs sometimes do not, particularly for the 11.6 vs 12 mm question.
Matching the vial to the inlet, not just the tray
Fitting the tray is necessary but not sufficient. The inlet side imposes its own constraints, and they are less obvious because the inlet does not touch the vial directly. The needle does, and the needle path is defined by the septum, the cap, and the injection port geometry.
Septum thickness and needle penetration
A standard 11 mm crimp septum is 1.0 mm thick (some are 0.9 mm, some 1.3 mm). A 9 mm screw septum is typically 1.0 mm as well, but the screw cap holds it under different compression. The needle has to traverse the septum, the headspace, and reach the sample. If the septum is too thick or over-compressed, the needle may coring or bend, and you get septum fragments in the vial and a blocked needle.
The practical number: a 23-gauge needle (0.64 mm OD) will puncture a 1.0 mm silicone/PTFE septum roughly 50 to 100 times before coring becomes a real risk, depending on needle sharpness and septum quality. A 22-gauge needle (0.72 mm) cuts that to 30 to 50 punctures. If your method uses a 22-gauge needle and you are running 96-well plates with multiple injections per vial, budget for septum replacement or use a pre-slit septum. Pre-slit septa are not free of problems either: they leak more in headspace work, so do not use them for GC headspace.
Headspace and GC inlets
If you are doing GC headspace, the vial is not just a container, it is a pressure vessel. A 2 mL headspace vial must hold 1 to 2 bar of carrier or pressurization gas at 40 to 80 °C without leaking. That means a crimp cap with a proper seal, not a screw cap with a PTFE-faced liner that creeps under pressure. The dimensional match here is the neck finish: an 11 mm crimp neck with a 20 mm crimp diameter is the standard for headspace, and a 9 mm screw neck is not rated for the same pressure. If your headspace sampler is set up for 20 mm crimp, do not substitute screw vials no matter how convenient they are.
The EPA SW-846 test methods specify vial and septum requirements for volatile organics (e.g., Method 8260), and those requirements are dimensional and material, not just volumetric. Method 8260 calls for a 40 mL VOC vial, not 2 mL, but the principle carries: the method defines the container, and substituting a different neck finish is a method deviation you have to document.
Glass grade, cap material, and the temperature question
Dimensions get you into the tray. Material gets you through the run. The two most common material mistakes I see are using Type I borosilicate where Type 33 is fine (wasting money) and using Type 33 where Type I is required (losing analytes to adsorption).
Glass
- Type I borosilicate (USP Type I). Low extractables, low alkali. Use for trace analysis, LC-MS, and anything with a low-level detection limit. Hydrolytic resistance per USP <661>. The 2 mL Type I vial is the default for HPLC autosamplers.
- Type 33 (soda-lime). Cheaper, higher extractables, fine for high-concentration work or where the analyte is not surface-active. Do not use for ppb-level work.
- Amber vs clear. Amber glass is a surface treatment or a bulk color; it protects light-sensitive analytes but can leach iron and other colorants. For LC-MS, clear Type I is usually the safer choice unless the analyte is genuinely photolabile.
Caps and septa
The cap is where the dimensional and material questions collide. An 11 mm crimp cap with a silicone/PTFE septum is the workhorse: silicone gives the seal, PTFE faces the sample and resists solvent attack. A butyl/PTFE septum is better for headspace because butyl has lower gas permeability. A pure silicone septum is fine for aqueous work but swells in toluene and dichloromethane.
Crimp torque matters more than people think. An 11 mm crimp needs to be crimped to roughly the point where the cap skirt is fully rolled under the neck bead, not crushed. Over-crimping cuts the septum and causes coring; under-crimping leaks. A hand crimper with a depth stop is worth the money. If you are buying in volume, ask for the crimp height specification (typically 6.0 to 6.3 mm for an 11 mm cap on a 32 mm vial) and check a sample with calipers.
On the screw side, a 9 mm screw cap should be torqued to about 0.5 to 0.8 N·m. Hand-tight is roughly 0.6 N·m for most analysts. Overtorquing deforms the septum and causes the same coring problem as over-crimping. If you are running a robotic capper, calibrate the torque and re-check it monthly.
A decision checklist with numbers
Here is the checklist I use when qualifying a new vial for an existing instrument. Hand this to procurement and make them tick every line before the PO goes out.
| Check | Target value | How to verify |
|---|---|---|
| Vial diameter | 32.0 ± 0.1 mm (or 11.6 ± 0.1 mm for short format) | Calipers on 10 vials from the lot |
| Vial height | 32.0 ± 0.2 mm (tall) or 31.6 ± 0.2 mm (short) | Calipers, check against tray nest depth |
| Neck OD | 11.0 ± 0.1 mm (crimp) or 9.0 ± 0.1 mm (screw) | Go/no-go gauge or calipers |
| Nest fit | Drops freely, no rattle, sits flush | Load a full tray and cycle the autosampler |
| Cap clearance | ≥ 5.5 mm above neck for crimp, ≥ 5.0 mm for screw | Measure tray clearance, add cap height |
| Septum thickness | 1.0 ± 0.1 mm | Calipers on 10 caps |
| Crimp height | 6.0 to 6.3 mm | Calipers after crimping a test vial |
| Screw torque | 0.5 to 0.8 N·m | Torque wrench on a test cap |
| Puncture count | ≥ 50 (23G), ≥ 30 (22G) | Run repeated injections, inspect septum |
| Leak test (headspace) | No pressure drop over 30 min at 80 °C | Pressurize and monitor |
| Extractables (Type I) | Pass USP <661> hydrolytic resistance | Supplier certificate + spot check |
That table is deliberately mechanical. Most vial problems are mechanical. The chemistry problems (adsorption, leaching, carryover) are real but rarer, and they usually show up as a slow drift in RSD rather than a hard failure. If your RSD% on a 6-injection precision run is above 2% for a well-behaved analyte, suspect the vial or the septum before you suspect the column.
Where OEM and aftermarket diverge
I have bought both. The OEM vial is the safe default because it is the one the instrument was qualified with, and if something goes wrong the vendor support call is shorter. The aftermarket vial is where the money is, and the good ones are dimensionally identical. The bad ones are not, and the difference is usually in the neck finish and the septum, not the glass body.
If you are going the aftermarket route, ask for the dimensional drawing and the septum durometer (typically 45 to 55 Shore A for silicone). A supplier who cannot produce a drawing with tolerances is a supplier who is guessing. The OEM vial sourcing channel is worth a look if you want the drawing-first approach without the OEM price, and the chromatography supplier network is where I would start for a second source on caps and septa specifically, because those are the parts that fail first.
One more thing on aftermarket: the GPI (Glass Packaging Institute) neck finish standards are the reference for screw-thread geometry. If a supplier’s 9 mm screw vial does not match the GPI 9 mm finish, the cap will cross-thread or leak. Ask for the GPI finish number. It is a five-second question that eliminates half the bad suppliers.
Troubleshooting checklist for dimensional mismatches
When a run fails and you suspect the vial, work through this in order. It is faster than swapping columns.
- Needle bends or coring. Check septum thickness and cap torque first. Then check vial height against tray depth. A vial sitting 0.4 mm low will make a fixed-depth needle pierce off-center.
- Gripper misses or drops the vial. Measure the vial diameter against the gripper jaw. A 0.2 mm undersize vial will slip. Check for a mixed lot: I have seen two dimensional families in one case because the warehouse pulled from two bins.
- Vial sits proud in the nest. Diameter oversize or a burr on the neck. Check with a go/no-go gauge.
- Leak in headspace. Crimp height out of spec or wrong septum material. Re-crimp a test vial and measure. Butyl/PTFE, not silicone, for headspace.
- High RSD% on precision run. Septum coring or adsorption on Type 33 glass. Switch to Type I and a fresh septum.
- Carryover between injections. Not always a vial problem, but check the septum for a retained drop and the cap for a loose seal. A 9 mm screw cap torqued below 0.5 N·m will weep.
- Autosampler aborts mid-tray. Mixed vial heights in one tray. Sort the tray by caliper and re-run.
If you are running HPLC and the failure is upstream of the vial, the HPLC consumables reference is the place to cross-check the rest of the flow path, but do the vial checks first because they are cheaper and faster.
What I would actually buy
For a standard HPLC autosampler tray (Agilent, CTC, or equivalent) running aqueous or mixed-solvent methods at ambient temperature, I would standardize on 32 x 11.6 mm clear Type I borosilicate vials, 11 mm crimp neck, with 1.0 mm silicone/PTFE septa and aluminum crimp caps. Crimp height 6.0 to 6.3 mm. That combination fits the widest range of trays, has the lowest extractables of the common formats, and the crimp seal is more reliable under pressure than a screw cap. Buy the crimper with a depth stop.
For GC headspace, switch to 20 mm crimp headspace vials (not 2 mL autosampler vials) with butyl/PTFE septa, and leak-test at your method temperature before the run. Do not try to make a 2 mL autosampler vial do headspace duty; the neck finish is wrong and the pressure rating is not there.
For LC-MS at low detection limits, stay with Type I clear glass and consider a pre-slit septum only if you have confirmed the injection port tolerates it. For high-throughput screening where cost dominates and the analyte is at high concentration, Type 33 is acceptable, but do not mix Type 33 and Type I in the same tray, because the dimensional tolerances differ enough to cause gripper problems.
Whatever you choose, qualify the lot. Buy one case, measure ten vials, run a 6-injection precision test, and check the septum after 50 punctures. If the RSD% is under 2% and the septum is intact, you have a supplier. If not, you have a return. The 0.4 mm that cost my lab a week is exactly the kind of thing a caliper catches in five minutes.
The short version: match the vial to the tray by measuring diameter, height, and neck finish against the tray’s nest and clearance numbers, then match the septum and cap to the inlet’s pressure and puncture requirements. The “2 mL” label tells you the fill volume and nothing else. The dimensions and the neck finish tell you whether it will work.
References & further reading
Related resources from our lab consumables network:
- 2Ml Vial at 2mlsamplevial.com
- Hplc Consumables at hplcconsumable.com
- Chromatography Supplier at chromatographysupplier.com
- Oem Vial at oemsamplevials.com
External references and standards: