
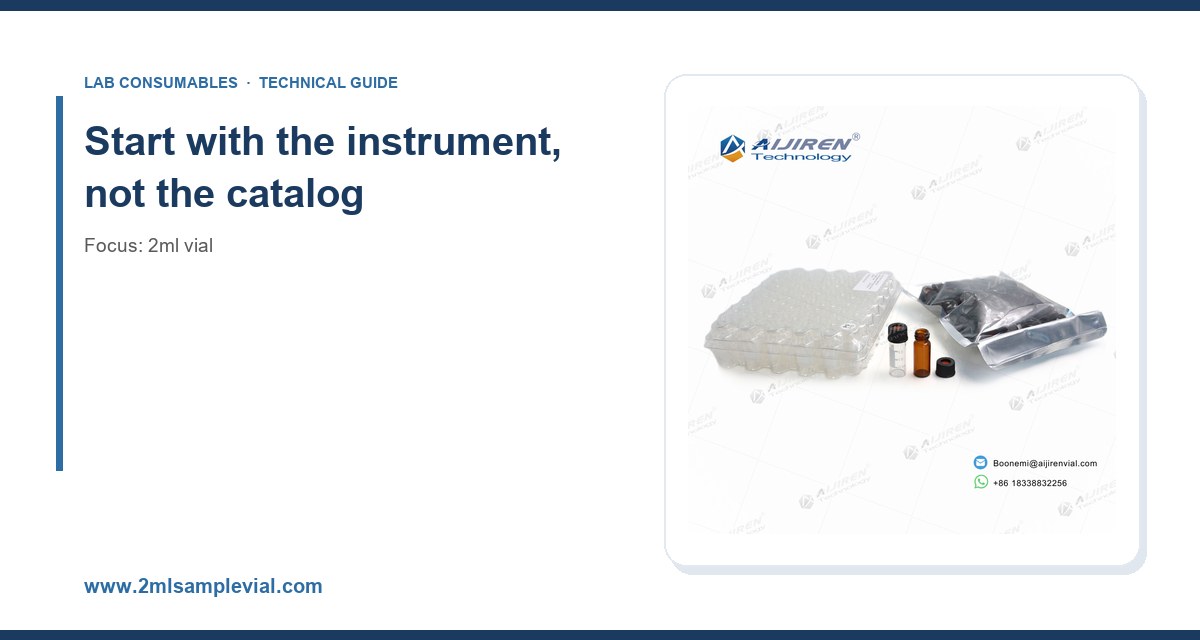
I have watched a lab buy 20,000 vials on price alone and then spend three weeks chasing ghost peaks that turned out to be silicone oil leaching from the septa. I have also seen a team pay triple for a “premium” vial that was dimensionally identical to the commodity part, right down to the glass draw. Choosing a 2ml vial is not complicated, but it is easy to get wrong because the failure modes are quiet. The vial does not usually announce itself as the problem. It shows up as a creeping baseline, a drifting retention time, or an autosampler that jams twice a shift.
This guide is what I wish someone had handed me early on. It covers the glass, the closure, the dimensional tolerances that actually matter, the septa chemistry, and the questions you should ask a supplier before you sign a blanket order. I have included numbers, torque values, puncture counts, and a decision checklist you can hand to a procurement team.
Every 2ml vial decision begins with the autosampler it will feed. The nominal “2ml” refers to the fill volume, not the physical envelope, and the physical envelope varies more than most buyers realize. A standard 12 x 32 mm vial is the workhorse format, and it is what most people mean when they say 2ml vial. But the same 12 x 32 mm footprint comes with different neck geometries, and those geometries are not interchangeable across instruments.
The three neck styles you will encounter are the crimp neck, the screw thread, and the snap or press-fit design. Each has a place. The crimp neck gives you the tightest seal and the best headspace control, which is why it dominates GC work where volatiles matter. The screw thread is faster to cap by hand and does not require a crimper, but the seal quality depends heavily on the cap torque and the septa compression. The snap cap is the fastest of all but the least reliable for long-term storage.
Matching neck style to autosampler
Do not assume your instrument accepts every style. Agilent’s autosamplers, for example, are specified against particular vial and cap combinations, and their published consumables catalogs list the exact part numbers that the tray geometry supports. The same is true across the Thermo Fisher chromatography and sample handling range. If you are running a mixed fleet, standardize on one format for the whole lab or you will spend your life swapping trays.
A practical rule I use: if the method involves headspace analysis or trace volatiles, crimp. If it is a high-throughput screening lab with hundreds of injections a day and mostly aqueous samples, screw thread with a properly torqued cap. If it is a teaching lab or a field kit, snap caps are fine as long as nobody expects a 72-hour hold time.
Glass: the part buyers ignore and operators regret
The glass is the largest single component of the vial and the one most often specified by price. That is a mistake. Glass chemistry affects adsorption, pH stability, and extractables, and the manufacturing process affects dimensional consistency, which affects autosampler reliability.
Type I borosilicate vs. Type III soda-lime
Type I borosilicate glass (often called USP Type I) has a borosilicate composition with low alkali release. It is the default for analytical work involving pH-sensitive analytes, trace metals, or anything that will sit in the vial for more than a shift. Type III soda-lime glass is cheaper and perfectly adequate for short-hold, high-throughput work with neutral analytes, but it leaches alkali over time and can shift the pH of an unbuffered sample.
For most HPLC and GC work I specify Type I borosilicate. The cost difference is typically a few cents per vial at volume, and the risk reduction is worth far more than that. If you are buying through a HPLC consumables distributor, ask for the glass type in writing. “Clear glass” is not a specification.
Clear, amber, and silanized
Amber glass is for light-sensitive analytes. It blocks most of the UV and visible range below about 500 nm, which is enough for vitamins, many pharmaceuticals, and most natural products. The tradeoff is that you cannot visually inspect the sample, so if your method depends on seeing a meniscus or a precipitate, amber is the wrong choice.
Silanized (deactivated) glass is worth the premium when you are working with polar or basic analytes at low concentration. Underivatized glass has surface silanol groups that adsorb amines and other basic compounds, and you can lose a meaningful fraction of a low-level analyte to the wall. Deactivation reduces that adsorption. If your recovery for a basic drug at 10 ng/mL is running 70%, try a deactivated vial before you blame the column.
Septa: where most contamination problems start
The septum is the most underestimated component in the whole assembly. It is also where I have seen the most expensive mistakes. A septum is a compromise between resealability, chemical inertness, and puncture life, and no single material wins on all three.
Septum materials and when to use them
- Silicone (often silicone/PTFE-faced): excellent resealability, good for multiple injections through the same cap, but silicone can leach low-molecular-weight siloxanes that show up as ghost peaks in GC-MS. Use a PTFE face on the sample side to limit contact.
- PTFE-faced silicone: the workhorse. The PTFE face gives chemical resistance to the sample, the silicone body gives the reseal. Good for most HPLC and GC work, typical puncture life of 3 to 5 injections through the same septum before reseal quality drops.
- Butyl rubber: better gas barrier than silicone, common in headspace and GC. Less resealable, so plan on fewer punctures per septum.
- PTFE/silicone laminated: the standard for HPLC autosamplers. The laminate gives a clean sample contact surface and predictable puncture behavior.
If you are doing trace analysis, specify a septum that has been tested for extractables and ask for the test data. Restek publishes septum extractable information and application notes that are worth reading before you commit to a material for a sensitive method; their technical resources for chromatography cover this in more detail than most suppliers will volunteer.
Puncture count and reseal
A septum is not infinite. The reseal degrades with each puncture, and once it stops resealing you get evaporation, air ingress, and sample loss. My working numbers: a good PTFE/silicone septum holds a seal for about 3 to 5 punctures in a single cap, and after that the risk of a leak climbs. For methods that inject the same vial multiple times, either use a fresh cap per injection series or accept that the later injections carry more risk.
Pre-slit septa are a different story. They are designed to be pierced easily, which reduces coring and needle bending, but they reseal less well than a solid septum. Use them for single-injection workflows, not for multi-injection sequences.
Dimensional tolerances that actually matter
The nominal dimensions of a 12 x 32 mm vial are exactly that: nominal. The tolerances are what determine whether your autosampler runs cleanly. Here are the numbers I check, and the ranges I consider acceptable for high-throughput work.
- Body diameter: 12.0 mm nominal, ±0.2 mm. Outside that, tray handling gets erratic.
- Height: 32.0 mm nominal, ±0.3 mm. Too tall and the needle does not reach the sample; too short and the needle bottoms out.
- Neck inner diameter: 6.0 mm nominal, ±0.1 mm. This is the one that bites. A neck that is 0.1 mm undersized will grip the needle and bend it.
- Wall thickness: 1.0 mm nominal. Thin walls crack under crimping pressure; thick walls reduce usable volume.
- Bottom geometry: flat, rounded, or conical. Conical bottoms let you recover the last 100 to 200 µL; flat bottoms are easier to automate.
Ask your supplier for the dimensional drawing with tolerances, not just the nominal dimensions. A supplier who cannot produce that drawing in an hour is a supplier I would not put on a blanket order.
Closures, crimping, and torque
The closure is where operator technique meets hardware specification. Get it wrong and you will chase leaks, evaporation, and needle damage for months.
Crimp caps
Crimp caps come in aluminum and aluminum with a plastic or colored top. The crimp is set by a crimping tool, and the quality of the crimp depends on the tool, the cap, and the operator. A properly crimped 11 mm aluminum cap should be seated with the septum compressed evenly and the skirt rolled under the bead of the vial neck. If the crimp is too loose you get evaporation; too tight and you crack the neck or deform the septum.
For a 20 mm crimp cap (used on larger vials), the torque equivalent is different, but the principle is the same: even compression, no rocking. Inspect a crimped vial under a loupe before you trust a batch. A skewed crimp will leak.
Screw caps and torque values
Screw thread caps are torque-sensitive. Too little torque and the septum does not seal; too much and you deform the septum, which can cause coring and needle damage. My working range for a 9 mm screw cap on a 12 x 32 mm vial is 0.5 to 0.8 N·m with a calibrated torque driver. Hand-tightening is not a specification, and it is the single most common cause of inconsistent results in screw-cap workflows.
If you are capping by hand, buy a torque-limiting driver and train the operators. It sounds excessive until you have watched a lab spend a week on a leak investigation that turned out to be one operator over-tightening every cap.
GPI and ISO references you should know
The closure interface is standardized, and knowing the standard saves you from compatibility surprises. The Glass Packaging Institute (GPI) publishes finish specifications for glass containers, and the relevant one for most 2ml work is the GPI 9 mm and GPI 11 mm finish definitions. The ISO equivalent for screw finishes is in the ISO 9050 family for glass, and the vial dimensions themselves are commonly referenced against ISO 8362 for injection containers, which sets the 12 x 32 mm envelope and the neck finish.
If you are buying OEM vials for an instrument manufacturer, the finish specification will be in the drawing. If you are buying commodity vials, ask for the GPI or ISO finish reference. A supplier who cannot name the standard is likely to be working from a copy of a copy, and the tolerances will drift.
When you need OEM and custom vials
There is a point where the commodity catalog stops working. Maybe you need a custom label, a specific septa material, a colored cap for a workflow that codes by color, or a vial that fits a proprietary autosampler tray. That is when you go to an OEM vial supplier and have the part built to your drawing.
Custom work is worth it when the volume justifies the tooling and when the failure mode of the commodity part is expensive. If you are losing 2% of injections to autosampler errors on a 500-injection-a-day line, the math on a custom vial is easy. If you are running 50 injections a week, it is not.
Supplier qualification: the questions that separate real suppliers from resellers
Most “suppliers” in this space are resellers. That is fine for commodity parts, but it becomes a problem when you need a specification, a lot traceability record, or a corrective action on a defective batch. Here is what I ask before I qualify a supplier, and I ask for the answers in writing.
- Can you provide the dimensional drawing with tolerances for the vial and the closure?
- What is the glass type, and can you provide a certificate of analysis for the glass lot?
- What is the septum material, and has it been tested for extractables? Can I see the data?
- What is the manufacturing location, and is there lot traceability from raw material to finished vial?
- What is your AQL for dimensional defects, and how do you inspect?
- Can you supply a sample lot for method validation before I commit to a blanket order?
A chromatography supplier who can answer all six in a day is worth keeping. One who deflects on the drawing or the AQL is a reseller, and you should price accordingly.
Decision checklist with concrete numbers
Here is the checklist I hand to procurement and to new operators. It is deliberately short, because a long checklist gets ignored.
- Format: 12 x 32 mm, 2ml fill, unless the instrument requires otherwise.
- Glass: Type I borosilicate for pH-sensitive or trace work; Type III acceptable for short-hold, neutral analytes.
- Color: clear for visual inspection; amber for light-sensitive analytes below 500 nm.
- Neck: crimp for headspace and trace volatiles; screw thread for high-throughput aqueous work; snap for teaching and field use.
- Septum: PTFE/silicone laminated for HPLC; butyl or PTFE-faced silicone for GC; deactivated glass for basic analytes at low concentration.
- Torque: 0.5 to 0.8 N·m for 9 mm screw caps, verified with a calibrated driver.
- Puncture budget: plan on 3 to 5 punctures per septum; replace the cap for multi-injection sequences.
- Tolerances: body 12.0 ± 0.2 mm, height 32.0 ± 0.3 mm, neck ID 6.0 ± 0.1 mm.
- Standard reference: GPI 9 mm or 11 mm finish; ISO 8362 for the 12 x 32 mm envelope.
- Qualification: drawing, CoA, extractables data, AQL, and a sample lot before the blanket order.
Troubleshooting checklist for common vial problems
When a method goes wrong and the column is not the obvious suspect, work through the vial and closure first. These are the failures I have seen most often, and the fix for each.
Ghost peaks and rising baseline in GC
Suspect the septum first. Silicone bleed shows up as siloxane peaks at characteristic masses, and it gets worse as the septum is heated. Swap to a PTFE-faced septum, run a blank with a fresh cap, and see if the peaks disappear. If they do, the septum was the source. If they persist, check the glass for residual manufacturing oils by rinsing a batch with solvent and re-running the blank.
Low recovery of basic analytes
Suspect adsorption to the glass. Run a recovery study with a deactivated vial against a standard vial at the same concentration. If the deactivated vial recovers more, the glass is the problem. This is common with amines at low ng/mL levels and is easy to miss because the loss is gradual and looks like instrument drift.
Autosampler jams and bent needles
Suspect dimensional tolerance. Measure a random sample of 20 vials from the lot with calipers against the drawing. If the neck ID or the height is out of tolerance, the lot is the problem. Also check the cap torque: an over-torqued cap deforms the septum, and a deformed septum can push the needle off-center.
Evaporation and concentration drift on hold
Suspect the seal. A loose crimp or an under-torqued screw cap will lose volatiles over a 24-hour hold. Weigh a capped vial before and after a 24-hour hold at 4 °C and at room temperature; a measurable mass loss means the seal is failing. Re-crimp or re-torque and repeat.
Coring and septa fragments in the sample
Suspect the needle and the septum together. A blunt or burred needle will core a septum on every injection, and the fragments end up in the sample and on the column. Inspect the needle under magnification, replace it if it is burred, and switch to a pre-slit septum if the method allows. Coring is also a sign of over-torqued caps, so check the torque driver.
Storage, handling, and the things nobody trains
Vials arrive in bags or trays, and the handling between the bag and the autosampler matters. Store them in the original packaging, away from solvent vapors, because silicone septa will absorb volatiles from the air in a solvent cabinet. I have seen a batch of septa pick up enough toluene from a nearby open bottle to show up as a peak in a blank.
Do not pre-cap vials and let them sit for days before use. The septum will take a set, and the seal quality drops. Cap immediately before injection, or use a validated hold time and prove it with a stability study.
Train operators on the torque driver and on the visual inspection of a crimp. The two minutes of training per operator pays back in fewer leak investigations. If you are running an EPA method under U.S. EPA SW-846 test methods for waste and materials, the holding times and preservation requirements are specified, and the vial and closure are part of how you meet them. A loose cap is a holding-time failure waiting to happen.
What I would buy, and why
For a general analytical lab running HPLC and GC with a mix of aqueous and organic samples, I would standardize on 12 x 32 mm Type I borosilicate clear vials, 9 mm screw thread, with PTFE/silicone laminated septa and a calibrated torque driver set to 0.6 N·m. That combination covers the majority of methods, is fast to cap, and gives predictable puncture behavior. For headspace and trace volatiles, I would keep a separate crimp-neck line with 11 mm aluminum caps and butyl or PTFE-faced silicone septa, crimped with a serviced crimper and inspected under a loupe.
For light-sensitive work, amber glass with the same closure. For basic analytes at low concentration, deactivated glass. For high-throughput screening, the same screw-thread format but with a pre-slit septum and a fresh cap per injection series.
The single biggest improvement most labs can make is not a different vial. It is a torque driver and a dimensional drawing. Buy the vial that matches your instrument and your analyte chemistry, get the tolerances in writing, and train the operators on the closure. The vial is a small part of the workflow, but it is the part that touches every sample, and getting it right removes a whole category of problems before they start.
References & further reading
Related resources from our lab consumables network:
- 2Ml Vial at 2mlsamplevial.com
- Hplc Consumables at hplcconsumable.com
- Chromatography Supplier at chromatographysupplier.com
- Oem Vial at oemsamplevials.com
External references and standards: