
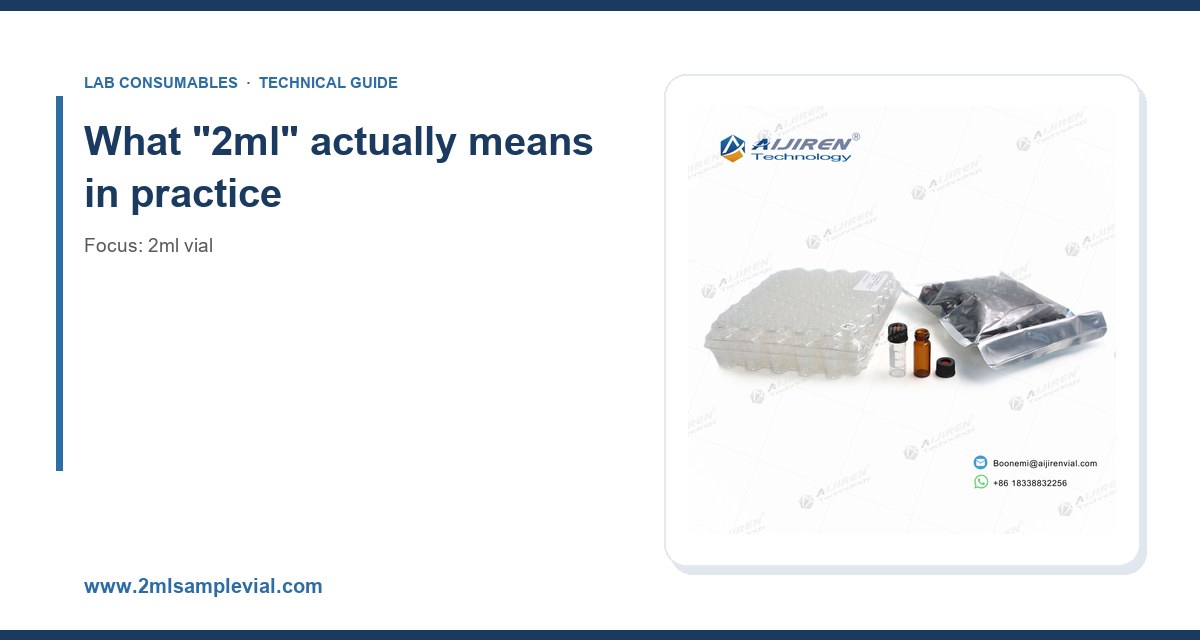
I have watched a lab buy 40 cases of 2ml vials on price alone and then spend three weeks chasing ghost peaks that turned out to be silicone oil from the wrong septum. I have also seen an autosampler jam 60 times in one overnight run because someone mixed a 32 mm cap with a 9 mm neck. The vial is the cheapest thing on the bench and the most common cause of a failed sequence. This guide is what I would hand a new procurement manager or a lab tech who has to pick, buy, and run 2ml vials without learning it the hard way.
The label “2ml vial” describes a nominal fill volume, not total glass capacity. A standard 12 x 32 mm vial holds about 2.0 ml to the shoulder and roughly 1.5 ml to 1.8 ml at a safe working level. Fill it to the neck and you get a higher injection error, more headspace variation, and a higher risk of the needle hitting liquid at the wrong depth. The 2ml vial format is standardized around 12 mm outside diameter, 32 mm height, and a 6 mm inner neck (some makers quote 6.0 mm ID, others 5.6 mm to 6.2 mm; this matters for needle guidance). If your method was written against a 12 x 32 mm vial, a 12 x 32 mm vial is the only thing that will reproduce it.
Three dimensions do most of the work:
- 12.0 mm OD (+/- 0.2 mm). Too wide and the autosampler gripper misses; too narrow and the vial wobbles in the tray.
- 32.0 mm height (+/- 0.3 mm). This sets the needle penetration depth and the crimp or cap seat.
- 6 mm neck ID. This controls septa compression, needle centering, and whether a 22-gauge needle will bend on the way in.
If you are running a 2ml format on an autosampler that expects 12 x 32 mm, do not substitute a 12 x 32 mm “wide mouth” or a 11 mm vial without revalidating the injection. The needle depth sensor on most modern autosamplers is calibrated to the standard 32 mm stack. I have seen a 0.5 mm height difference produce a 4% RSD shift on a 1 µL injection because the needle sat 0.5 mm higher in the liquid.
Glass: the first buying decision
You have three realistic glass choices for a 2ml vial: Type I borosilicate (USP Type I), Type II dealkalized soda-lime, and Type III soda-lime. For HPLC and GC sample prep, Type I borosilicate is the default. It has a low coefficient of thermal expansion (about 3.3 x 10^-6 /°C), resists pH extremes better than soda-lime, and does not leach alkali metals into aqueous samples at the parts-per-billion level that will wreck an ion-exchange or IC method.
Where people get into trouble is clear vs. amber and the “certified” claim. Amber glass for a 2ml vial is usually Type I borosilicate with an iron oxide tint. It blocks light below 500 nm reasonably well, but it is not opaque. If your analyte is photolabile (vitamin D, riboflavin, some nitroaromatics), amber helps but does not replace a dark autosampler compartment. “Certified” on a vial box usually means the manufacturer has documented dimensional conformance to a drawing and, in some cases, a low-extractable wash. It is not a regulatory certification. Read the certificate of analysis and check what was actually measured.
When soda-lime is acceptable
Type III soda-lime vials are fine for short-hold, non-aqueous, or high-concentration work where leaching and pH drift are not on the critical path. They are cheaper by 30% to 50%. I would not put a pH 9 aqueous buffer in a soda-lime vial overnight and then inject it the next morning. The pH will move and the sodium background will climb. For a same-day, high-concentration standard, soda-lime is a defensible cost decision.
Closure systems: crimp, screw, and snap
The closure is where most workflow failures happen. A 2ml vial is only as good as the seal on top of it.
Crimp caps (11 mm and 20 mm)
Standard 12 x 32 mm vials use an 11 mm crimp cap. The 20 mm crimp is the older wide-mouth format and is increasingly rare on new autosamplers. Crimp gives the best seal integrity and the lowest septum creep, which is why it dominates GC headspace and long-hold HPLC work. The trade-off is that crimping is a skill. A bad crimp leaks, a good crimp is repeatable.
Concrete numbers for a manual or pneumatic crimper on an 11 mm aluminum cap:
- Crimp height after sealing: 6.0 mm to 6.4 mm measured from the vial shoulder to the top of the cap.
- Crimp diameter: 11.0 mm to 11.2 mm at the skirt.
- Crimper jaw pressure: enough to deform the aluminum without cutting the septum. On a pneumatic crimper, 60 to 80 psi is typical; on a manual crimper, one firm squeeze, not two.
The failure mode I see most: over-crimping. The aluminum skirt folds over the glass bead, the septum is compressed past its elastic limit, and the vial leaks at the needle puncture after the first injection. A second failure mode is under-crimping, where the cap spins freely. If the cap spins, it will leak in the autosampler tray. Check a sample of 10 vials per box with a go/no-go gauge if you are running a validated method.
Screw caps (9 mm and 10-425)
The 9 mm short-thread screw cap is the workhorse for 12 x 32 mm vials in HPLC. It seats with a quarter to half turn and does not need a crimper. The 10-425 is a longer thread used on some 2ml and 4ml formats; the “425” refers to the GPI thread finish (Glass Packaging Institute standard). GPI 9 mm and GPI 10-425 are not interchangeable. If your cap does not thread smoothly in one turn, you have the wrong thread, not a bad vial.
Torque matters. For a 9 mm screw cap with a PTFE/silicone septum, hand-tight plus a quarter turn is roughly 0.8 to 1.2 N·m. Over-torque (above about 1.5 N·m) compresses the septum and can cause coring on needle entry. Under-torque (below 0.5 N·m) lets the cap back off during a long sequence. A torque screwdriver with a 1 N·m setting is a cheap insurance policy if you run 500 injections a week.
Snap caps and press-fit
Snap caps are convenient and terrible for anything that needs a vapor-tight seal over hours. They are fine for short autosampler runs and for sample storage measured in hours, not days. I would not use a snap cap for a volatile analyte in a 24-hour sequence. The seal is mechanical interference, not compression, and it relaxes.
Septum selection: the part that actually touches your sample
The septum is the most under-specified component in a vial purchase and the most common source of contamination. Three materials cover 90% of use:
- Silicone (often silicone/PTFE-faced): excellent reseal, high puncture count (50 to 100 punctures before leakage), but silicone bleeds and can show up as siloxane peaks in GC-MS at m/z 73, 147, 207, 281. Use PTFE-faced silicone where the sample contacts only the PTFE.
- PTFE/silicone laminate: the standard HPLC septum. PTFE face toward the sample, silicone backing for reseal. Good to about 100 punctures at 22-gauge, less at larger gauge.
- Bonded or molded PTFE: lowest bleed, best for trace analysis, but lower puncture count and higher cost.
Temperature rating is a real constraint. A standard silicone/PTFE septum is good to about 100 °C continuous. Above that, silicone hardens and the reseal property drops. For headspace at 150 °C to 200 °C, you need a high-temperature septum (often a silicone with a PTFE face rated to 200 °C) and a crimp cap, not a screw cap. Check the manufacturer’s continuous rating, not the “maximum” number, which is usually a short excursion.
Puncture count is a specification you should ask for in writing. A septum rated for 50 punctures at 22-gauge is not rated for 50 punctures at 18-gauge. Larger needles core the septum faster. If you are running a 0.5 mm ID needle (about 25-gauge), you will get more punctures than a 0.9 mm (20-gauge).
Pre-slit septa
Pre-slit septa reduce coring and needle bending, and they are useful for autosamplers with a fixed needle path. The trade-off is a higher evaporation rate on long holds. For a 12-hour sequence with a volatile solvent, a pre-slit septum can lose measurable volume. Use pre-slit for short runs and non-volatile analytes; use solid septa for long holds.
A decision checklist with numbers
Use this table when you are writing a purchase spec. It is the same checklist I use when a lab asks me to audit a vial program.
- Format: 12 x 32 mm, 12.0 mm OD, 32.0 mm height, 6 mm neck ID. Confirm against the autosampler drawing.
- Glass: Type I borosilicate for aqueous, pH-sensitive, or trace work. Type III soda-lime only for same-day, high-concentration, non-aqueous.
- Color: clear for visible inspection; amber for photolabile analytes, with a dark compartment.
- Closure: 11 mm crimp for GC/headspace and long holds; 9 mm screw for HPLC routine; snap only for short runs.
- Septum: PTFE/silicone laminate for HPLC; high-temp silicone/PTFE for headspace above 100 °C; bonded PTFE for trace GC-MS.
- Puncture rating: at least 50 punctures at your needle gauge; ask for the gauge the rating was measured at.
- Temperature: continuous rating at least 20 °C above your method maximum.
- Torque: 0.8 to 1.2 N·m for 9 mm screw caps; verify with a torque screwdriver.
- Crimp dimensions: 6.0 to 6.4 mm height, 11.0 to 11.2 mm diameter; go/no-go gauge on 10 per box.
- Cleanliness: low-extractable or “washed” grade for trace work; check the certificate for the wash and the test method.
Matching the vial to the autosampler
The autosampler is the real customer. A vial that fits the tray and the gripper is the baseline; a vial that fits the needle path and the injection port is the goal. Two numbers to confirm before you buy:
Tray capacity and vial height. A 12 x 32 mm vial in a standard 100-position tray is a known geometry. If you substitute a 12 x 32 mm vial with a taller cap (some 9 mm caps add 1 mm), the gripper may not clear the tray lid. Measure the total stack height (vial plus cap) against the autosampler drawing. A 32 mm vial with a 9 mm screw cap is typically 32.0 to 32.5 mm total; a crimp cap adds about 0.5 mm.
Needle depth and bottom geometry. Most 12 x 32 mm vials have a flat or slightly concave bottom. A conical or “crimp-top” insert changes the residual volume. If your method injects 1 µL from a 100 µL sample, you need the needle to sit within 1 mm of the bottom. A vial with a 1.5 mm bottom thickness will leave more dead volume than one with a 1.0 mm bottom. For low-volume work, use a 300 µL insert or a 2ml vial with a conical bottom and confirm the needle depth in the method.
If you are standardizing across instruments, the Agilent chromatography consumables and columns documentation and the Thermo Fisher chromatography and sample handling pages both publish autosampler vial drawings you can check against. I keep a printed copy of the tray drawing in the lab binder; it settles arguments faster than a datasheet.
Cleanliness, extractables, and the ghost peak problem
For trace analysis, the vial is a sample preparation step, not a container. Two failure modes dominate:
Silicone oil bleed. A poorly cured silicone septum releases siloxanes that appear in GC-MS as a repeating pattern at m/z 73, 147, 207, 281. If you see that pattern in a blank, the septum is the first suspect, not the column. Switch to a PTFE-faced or bonded PTFE septum and re-run the blank.
Alkali leaching from soda-lime glass. At pH above 8, soda-lime glass releases sodium and other ions. In ion chromatography this shows as a rising baseline and a sodium peak that grows with hold time. Type I borosilicate reduces it but does not eliminate it; for ultra-trace work, use a washed, low-extractable vial and a short hold.
Ask for the wash specification. A “low extractable” vial is typically washed and then tested for a defined set of extractables by a defined method. If the certificate does not name the method, the claim is marketing. The U.S. EPA SW-846 test methods for waste and materials are a useful reference for how extractable testing is structured, even if your lab is not doing environmental work; the method logic (blank, spike, recovery) is the same.
Operational precautions that save sequences
These are the things I put on a one-page SOP taped to the autosampler.
- Never mix cap and vial lots without a fit check. A 9 mm cap from one supplier on a 9 mm vial from another is usually fine, but “usually” is not a validation. Check 10 vials per new lot.
- Fill to the shoulder, not the neck. A 2ml vial filled to 1.8 ml has less headspace and less evaporation, but a higher risk of the needle hitting liquid at the wrong depth. Stay at 1.0 to 1.5 ml for routine work.
- Do not re-crimp. A crimp cap is single-use. Re-crimping a used cap deforms the skirt and the seal fails.
- Torque screw caps to 0.8 to 1.2 N·m. A torque screwdriver is cheaper than a re-run.
- Check septum temperature rating against the method maximum, not the autosampler setpoint. The septum sees the oven temperature in headspace, not the tray temperature.
- Store vials capped and upright. An open box of vials picks up dust and lab volatiles. I have seen a box of vials stored next to a solvent cabinet pick up a solvent peak in the blank.
- Run a blank vial from each new lot. One injection of mobile phase in a vial from the new box catches most lot problems before they hit a sequence.
Troubleshooting checklist
When a sequence fails and the vial is a suspect, work through this in order. It is faster than swapping parts.
- Ghost peaks in the blank: swap to a PTFE-faced or bonded PTFE septum; check the vial wash grade; check storage near solvents. Siloxane pattern at m/z 73/147/207/281 points to septum.
- Rising baseline or sodium peak: suspect soda-lime glass or a pH above 8. Switch to Type I borosilicate and shorten the hold.
- Volume loss over a long sequence: check cap torque (0.8 to 1.2 N·m), check for a pre-slit septum, check the cap thread (GPI 9 vs 10-425).
- Needle bending or coring: check septum puncture rating against needle gauge; check needle depth; switch to a pre-slit septum for fixed-path autosamplers.
- Autosampler gripper errors: measure vial OD (12.0 +/- 0.2 mm) and total stack height; check for a mixed lot of caps.
- Leak after first injection: over-crimped cap (height above 6.4 mm) or over-torqued screw cap (above 1.5 N·m). Re-seal a fresh vial and re-check.
- Injection volume RSD above 2%: check fill level (1.0 to 1.5 ml), check needle depth, check for a conical bottom leaving dead volume.
For method-specific troubleshooting, the Restek technical resources for chromatography are a good cross-check on septum bleed and inlet issues, and they are written for the bench rather than the conference room.
Buying: what to put in the purchase order
A vial purchase order that says “2ml vial, 12×32, clear, qty 1000” is an invitation to a substitution. Write the spec. At minimum:
- Format: 12 x 32 mm, OD 12.0 +/- 0.2 mm, height 32.0 +/- 0.3 mm, neck ID 6.0 mm nominal.
- Glass: USP Type I borosilicate, clear or amber.
- Closure: 11 mm aluminum crimp with PTFE/silicone septum, or 9 mm screw with PTFE/silicone septum. State the GPI thread if screw.
- Septum: material, temperature rating (continuous), puncture rating and the needle gauge it was measured at.
- Cleanliness: wash grade and the test method on the certificate.
- Lot traceability: lot number on the box and the certificate.
- Sample: request 50 vials from the production lot for a fit and blank check before the full order.
If you are buying at volume or need a private-label box, the OEM vial route lets you specify the drawing and the septum and get a consistent lot. That is worth it if you run more than about 20,000 vials a year and have had a substitution problem. For the broader consumables package (caps, septa, inserts, filters), a HPLC consumables supplier that stocks the full 12 x 32 mm family reduces the number of lots you have to qualify.
Cost, lead time, and the substitution trap
The price spread on a 2ml vial is wide: a basic clear Type I borosilicate 12 x 32 mm crimp vial runs from a few cents to about 30 cents each depending on volume, glass type, wash grade, and closure. A washed, certified, low-extractable vial with a bonded PTFE septum can be 3 to 5 times the basic price. That is not a reason to default to the cheap one. The cost of a failed sequence (instrument time, analyst time, re-prep) is usually 10 to 100 times the vial cost.
Lead time is the other trap. Standard 12 x 32 mm vials are usually stock items. A custom septum, a private-label box, or a washed grade can add 4 to 8 weeks. If you are qualifying a new supplier, order the sample lot 10 weeks before you need production volume. I have seen a lab run out of a qualified lot and substitute an unqualified one to keep a sequence running; that is how ghost peaks get into a validated method.
Use a chromatography supplier that can give you the drawing, the certificate, and the lot traceability in one place. If a supplier cannot produce a drawing on request, that is your answer.
Recommendation
For a general HPLC and GC sample-prep workflow, I would standardize on a 12 x 32 mm, clear USP Type I borosilicate 2ml vial with a 9 mm screw cap and a PTFE/silicone septum for routine HPLC, and a separate 11 mm crimp line with a high-temperature septum for headspace above 100 °C. Specify the OD at 12.0 +/- 0.2 mm, height at 32.0 +/- 0.3 mm, septum puncture rating at 50 or more at your needle gauge, and a continuous septum temperature rating at least 20 °C above your method maximum. Torque screw caps to 0.8 to 1.2 N·m, crimp to 6.0 to 6.4 mm height, and check 10 vials per lot with a go/no-go gauge. Run one blank from each new lot before it enters a sequence.
If you are doing trace GC-MS, upgrade the septum to bonded PTFE and the glass to a washed, low-extractable grade, and accept the 3 to 5 times cost. If you are doing same-day, high-concentration, non-aqueous work, Type III soda-lime is a defensible cost cut. The vial is not the place to save the last 10 cents.
The single most useful thing you can do this quarter is write the vial spec into your purchase order and keep a printed autosampler drawing in the lab binder. Most of the failures in this guide come from a substitution, a mixed lot, or a cap that was never checked against the thread. None of those are glass problems. They are buying and handling problems, and they are fixable with a drawing, a torque screwdriver, and a blank injection.
References & further reading
Related resources from our lab consumables network:
- 2Ml Vial at 2mlsamplevial.com
- Hplc Consumables at hplcconsumable.com
- Chromatography Supplier at chromatographysupplier.com
- Oem Vial at oemsamplevials.com
External references and standards: